IdentityServer3 with PKCE Part 1 - Simple OAuth2 Server
2017-05-08 10:05
This series simulates a native application accessing a protected Web API resource, using OAuth2 via IdentityServer3. It demonstrates using Proof Key for Code Exchange (PKCE), and is in four parts:
- Build a simple authorization server, consumed by native application.
- Build a protected resource.
- Persist server configuration to database.
- Persist user data to database using Microsoft.Identity and SQL Server.
Important
This series does not create an OpenID Connect (OIDC) server. It is OAuth-only, since the PKCE specification doesn't require OIDC.
Overview - Why PKCE?
References
A Guide to OAuth 2.0 Grants Proof Key for Code Exchange
Mobile (i.e. "native") applications are difficult when it comes to authorizing users. The reasons are: they are long-lived, and can't keep a secret.
In the descriptions below, "two-step" means calling the authorization endpoint then the token endpoint, "one-step" means calling just the token endpoint, "trusted" means the client can keep a secret key, "short-lived" means only an access token, and "long-lived" means an access+refresh token.
The standard OAuth 2 grants are:
- Authorization code grant (two-step, trusted, long-lived)
- Implicit grant (one-step, short-lived, meant for javascript-only browser apps)
- Resource owner credentials grant (one-step, trusted, long-lived, for passing user/password)
- Client credentials grant (one-step, trusted, short-lived, meant for app access, not users)
- Refresh token grant (one-step, requires access token)
None of these fits well for a mobile app, which is untrusted but long-lived. The solution is Proof Key for Code Exchange (PKCE). PKCE generates a temporary secret string and a way to verify that string. It sends the secret to the authorization endpoint, which stores it, then sends the validator to the token endpoint, which verifies the stored secret. This mitigates the threat of another application capturing the authorization code; without the secret/validator, the auth code is useless.
Authorization Server - Simplistic
References
Simplest OAuth Server
Simplest OAuth2 Walkthrough Code
We'll create a simple OAuth2 server using IdentityServer3. We won't even create a Web API, so we can see just the server in operation. In other words, we'll be able to get tokens, but have nothing to use them with.
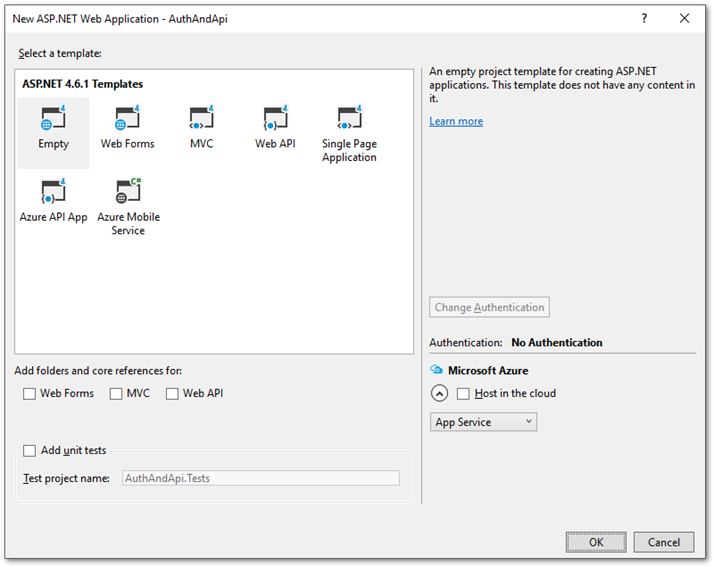
Create a new Empty web application project named AuthAndApi
Install packages for the authentication server. This assumes using IIS for the web host.
Install-Package IdentityServer3 -Project AuthAndApi
Install-Package Microsoft.Owin.Host.Systemweb -Version 3.1.0 -Project AuthAndApi
All the IdentityServer documents say RAMFAR should be enabled in web.config.
  <system.webServer>
    <modules runAllManagedModulesForAllRequests="true" />
  </system.webServer>
Add Folders for IdOptions and IdUsers. These represent the database storage we'll configure later.
In IdOptions folder, add these classes.
Scopes.cs
using System;
using System.Collections.Generic;
using System.Linq;
using System.Web;
//Added
using IdentityServer3.Core.Models;

namespace AuthAndApi.IdOptions
{
    public class Scopes
    {
        public static List<Scope> Get()
        {
            return new List<Scope>
            {
                //Create the email scope for OAuth. Later, when using OpenID Connect, return StandardScopes.Email instead
                new Scope() { Name = "email", DisplayName = "Email", Claims = new List<ScopeClaim>() { new ScopeClaim("email", true) } }
            };
        }
    }
}
Clients.cs
using System;
using System.Collections.Generic;
using System.Linq;
using System.Web;
//Added
using IdentityServer3.Core.Models;

namespace AuthAndApi.IdOptions
{
    public class Clients
    {
        public static List<Client> Get()
        {
            return new List<Client>()
            {
                //A client is an application configured to request tokens.
                //The resource, such as Web API, is configured to accept these tokens.
                new Client()
                {
                    ClientName = "Pretend Android Mobile App",
                    ClientId = "a065ae9f-0d02-45fa-85b6-4dc93e2ad5ef",
                    Enabled = true,
                    //About Reference vs JWT tokens
                    //https://leastprivilege.com/2015/11/25/reference-tokens-and-introspection/
                    AccessTokenType = AccessTokenType.Reference,
                    Flow = Flows.AuthorizationCodeWithProofKey,
                    AllowedScopes = new List<string>
                    {
                        "email"
                    },
                    //URIs the authorization code is allowed to be redirected to
                    RedirectUris = new List<string>()
                    {
                        "http://localhost:19191/"
                    },
                    //Shouldn't be required for this flow, but is
                    ClientSecrets = new List<Secret>()
                    {
                        new Secret("e9711973-edd7-496f-b415-b10ad0667305".Sha256())
                    }
                }
            };
        }
    }
}
In IdUsers folder:
Users.cs
using System;
using System.Collections.Generic;
using System.Linq;
using System.Web;
//Added
using IdentityServer3.Core.Services.InMemory;
using System.Security.Claims;
namespace AuthAndApi.IdUsers
{
    public class Users
    {
        public static List<InMemoryUser> Get()
        {
            return new List<InMemoryUser>
            {
                new InMemoryUser
                {
                    //Subject is identifier? Could be external identity,
                    //so it's not our own database primary key
                    Subject = "1",
                    Username = "alice",
                    Password = "secret",
                    Claims = new List<Claim>()
                    {
                        new Claim("email", "alice@example.com")
                    }
                }
            };
        }
    }
}
Add Startup.cs. This is the class that builds the OWIN pipeline, so the order in which features are added is important.
using System;
using System.Collections.Generic;
using System.Linq;
using System.Web;
//Added
using IdentityServer3.Core.Configuration;
using Owin;
using AuthAndApi.IdOptions;
using AuthAndApi.IdUsers;


namespace AuthAndApi
{
    public class Startup
    {
        public void Configuration(IAppBuilder app)
        {
            //Configure IdentityServer for issuing authentication tokens
            var options = new IdentityServerOptions
            {
                Factory = new IdentityServerServiceFactory()
                .UseInMemoryClients(Clients.Get())
                .UseInMemoryScopes(Scopes.Get())
                .UseInMemoryUsers(Users.Get()),
                //SSL MUST be used in production
#if DEBUG
                RequireSsl = false
#endif
            };
            //add to the pipeline
            app.UseIdentityServer(options);
        }
    }
}
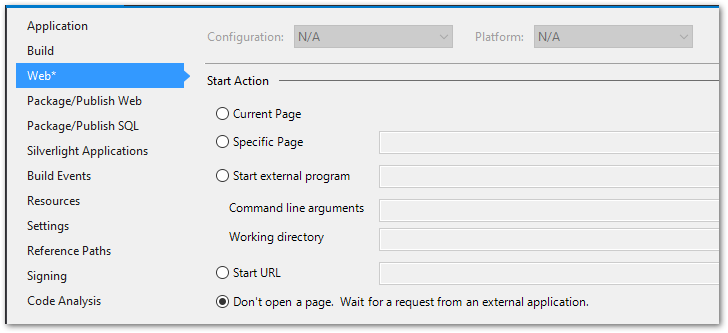
The basic IdentityServer is configured for OAuth. For now, we don't need a web page to open, since this is a server, so turn off displaying the page in project Properties.
Note about Reference vs JWT tokens
There are two general types of access tokens IdentityServer can return: Reference, or JSON Web Token (JWT). JWTs are self-contained; they can be validated without contacting the server. But they're slightly more complicated to configure. One advantage of using Reference tokens is that they can be quickly revoked, since the resource must call the authorizing server on each use. The disadvantage is this increases network traffic.
Pretend Mobile App - Get Token
References
Simplest OAuth Server
Simplest OAuth2 Walkthrough Code
Now we're going to get an authorization code and token from the server, using a native application that simulates a mobile app. In the Authorization Code Grant, the authorization code is retrieved by using an agent--normally a web browser. Mobile apps can open browsers on behalf of applications, providing a seamless experience. They can also register special URIs to receive requests. The basic flow is:
Front Channel
- App requests code from the server's authorization endpoint, and includes what URI to post the results to.
- Browser opens, server presents authentication/authorization screens, then posts code to supplied URI.
Back Channel
- App reads the code and sends request to the server's token endpoint.
- Server validates, then responds with the access token.
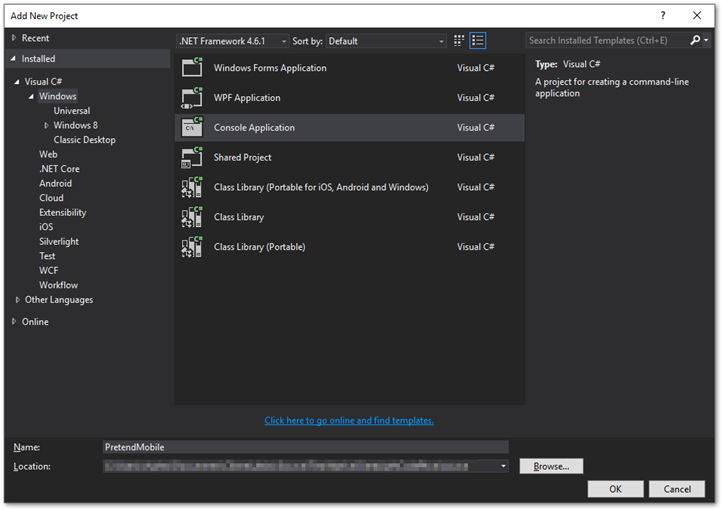
Add a standard console application to the solution, named PretendMobile.
Add packages. These aren't required (and wouldn't be available for a mobile application). They just include helper classes and methods for the HTTP communication. Anything they do could be done with HttpClient or some other appropriate network library.
Note
Version number is important! Later versions are for .Net Core.
Install-Package IdentityModel -Version 1.9.2 -Project PretendMobile
Program.cs
using System;
using System.Collections.Generic;
using System.Linq;
using System.Text;
using System.Threading.Tasks;
//Added
using System.Diagnostics;
using System.IO;
using System.Net;
using System.Net.Http;
using IdentityModel;
using IdentityModel.Client;

namespace PretendMobile
{
    class Program
    {
        static void Main(string[] args)
        {
            var response = GetAccessToken();
            Console.WriteLine("Access Token: " + response.AccessToken);
            Console.ReadLine();
        }

        static TokenResponse GetAccessToken()
        {
            string clientId = "a065ae9f-0d02-45fa-85b6-4dc93e2ad5ef";
            string clientSecret = "e9711973-edd7-496f-b415-b10ad0667305";
            string scope = "email";
            string redirectUri = "http://localhost:19191/";
            string verifier = CryptoRandom.CreateUniqueId(64);
            string codeChallenge = verifier.ToCodeChallenge();
            string authorizationEndpoint = "http://localhost:27230/connect/authorize";
            string tokenEndpoint = "http://localhost:27230/connect/token";

            //Front channel to get the authorization code
            //This simulates the mobile app starting a browser session on the authorization server,
            //allowing the user to authenticate,
            //while the app waits for the redirect from the auth server that contains the code.
            OpenBrowserToAuthenticate(authorizationEndpoint, clientId, scope, redirectUri, codeChallenge);
            string code = ReceiveAuthCodeFromServer(redirectUri);
            Console.WriteLine("Authorization Code: " + code);

            //Back channel to get the access token
            //The client secret is still required by IdentityServer, even though it's not
            //really secret. The code challenge and verifier are the real secret.
            //The redirectUri is part of the verification process. There's no actual redirection.
            var client = new TokenClient(
                tokenEndpoint,
                clientId,
                clientSecret);
            return client.RequestAuthorizationCodeAsync(code, redirectUri, verifier).Result;
        }

        static void OpenBrowserToAuthenticate(string authorizationEndpoint, string clientId, string scope, string redirectUri, string codeChallenge)
        {
            string nonce = CryptoRandom.CreateUniqueId(64);

            AuthorizeRequest request = new AuthorizeRequest(authorizationEndpoint);
            string url = request.CreateAuthorizeUrl(
                clientId: clientId,
                responseType: "code",
                scope: scope,
                redirectUri: redirectUri,
                nonce: nonce,
                responseMode: OidcConstants.ResponseModes.FormPost,
                codeChallenge: codeChallenge,
                codeChallengeMethod: OidcConstants.CodeChallengeMethods.Sha256);

            Debug.WriteLine(url);
            Process.Start(url);
        }

        static string ReceiveAuthCodeFromServer(string redirectUri)
        {
            var web = new HttpListener();
            web.Prefixes.Add(redirectUri);
            Console.WriteLine("Listening for request from auth server...");
            web.Start();
            var req = web.GetContext().Request;
            Stream body = req.InputStream;
            var encoding = req.ContentEncoding;
            var reader = new StreamReader(body, encoding);
            string code = reader.ReadToEnd().Replace("code=", "");
            Console.WriteLine("Got it, closing.");

            //Not sure how, but the mobile app should end the browser session, maybe when the app
            //gets the response.
            body.Close();
            reader.Close();
            web.Close();
            return code;
        }

    }
}
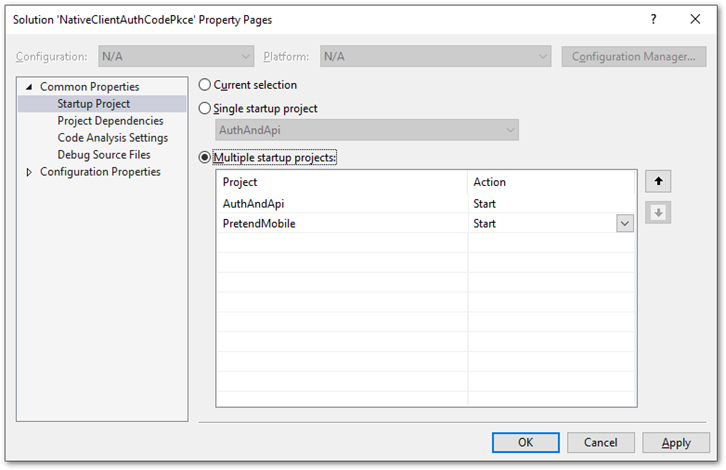
Let's configure the solution to run both projects. Right-click Solution and choose Properties. Change the Startup Project to "Multiple startup projects," the Actions to "Start," and be sure the identity server project starts first.
Run the solution.
- The server will start.
- The console application will open a browser to the /authorize endpoint, requesting an authorization code.
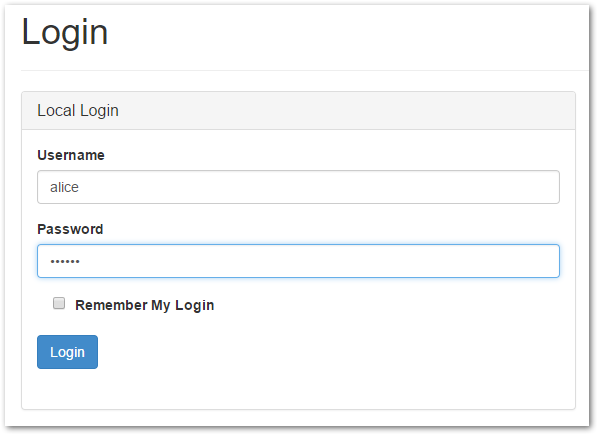
- Authenticate using credentials "alice" and "secret".
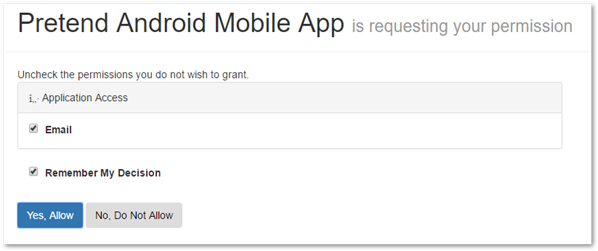
- Authorize the requested scope(s).
- The authorization code is sent back to the listening application.
- The app sends a direct request to the /token endpoint, requesting an access token.
- The server returns the token.
Wrap Up
We've built a basic OAuth2 server that uses the Authorization Code Grant plus PKCE for dynamically generated client secrets, and can get an access token. In the next part, we'll build a protected resource that requires a token.

