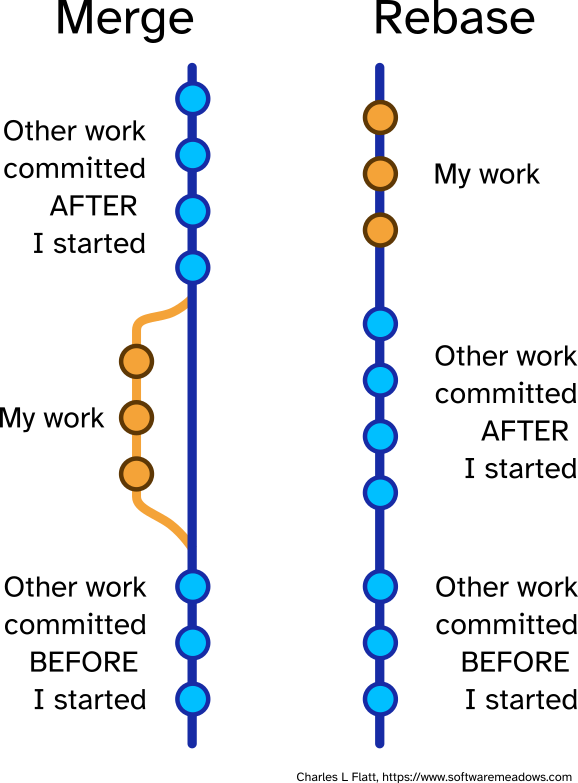
Graphic - Git Merge vs Rebase
2021-05-18 16:22

Comment for me? Send an email. I might even update the post!
2021-05-18 16:22
2021-05-17 16:00
Series Parts
The default Azure DevOps Scrum process is good, but I think it adds some unnecessary complication. Below I'll walk through inheriting from and modifying that process. I'm building on the work in my post A Simple Intro to Scrum in Azure DevOps, so you should start there if you need to.
Lots of what's below is my opinion, so take it for what it's worth. But don't discount it, that's mean.
In my experience, when Developers, Scrum Masters, and Product Owners get their hands on electronic project management software, they add and add to what's already there. This is usually a mistake. Instead, pare down to the simplest thing that works, and only add features when needed.
As an aside, the other thing organizations do is try to enforce a single process on all teams. This is not Agile, because it removes team autonomy, self-organization, and effectiveness. The usual reason given is to make reporting across teams easier. That gives too much weight to upper management control. Instead, ask Developers to help figure out how to deliver cross-team reports. While you're at it, see if you can pare down those reports, too. Ask, "How is this report delivering user value?"
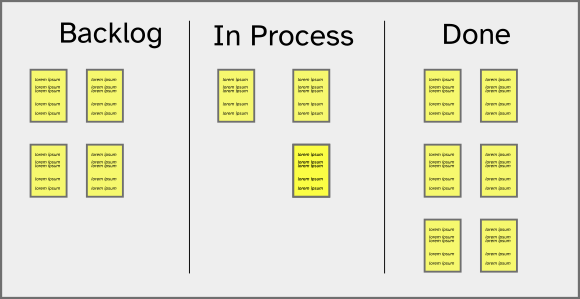
One way to find the simplest thing that works is imagine--or put--it on paper. Here's all we're really trying to capture.
The work item structure is:
Feature
|_Story
  |_Task
|_Bug
Stories and bugs move through a board.
A story or bug card--sticky note version!--might look like this and has all the relevent info plus pointers to more detail.
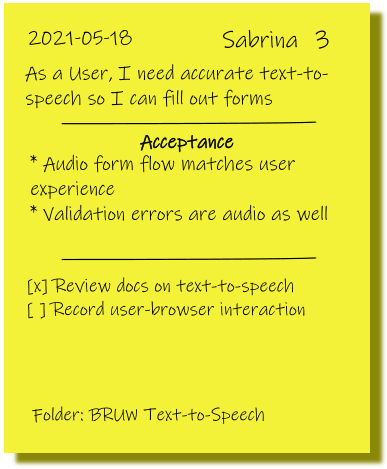
Try to keep your electronic version that simple.
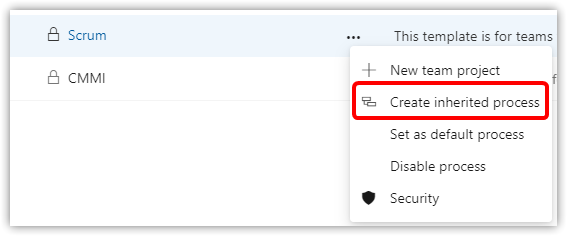
Open Azure DevOps and open the Organization Settings > Boards > Process
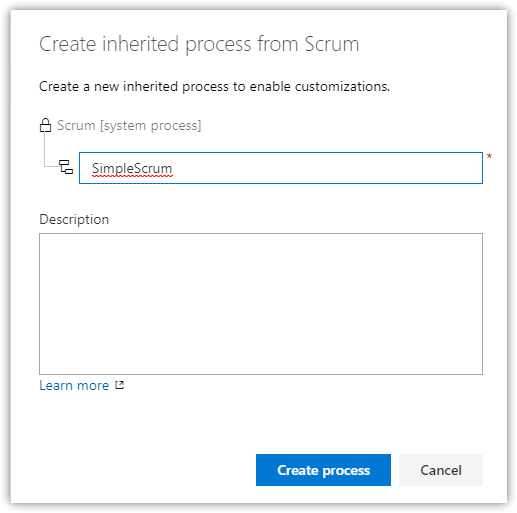
Select Scrum > Create inherited process, and name it SimpleScrum
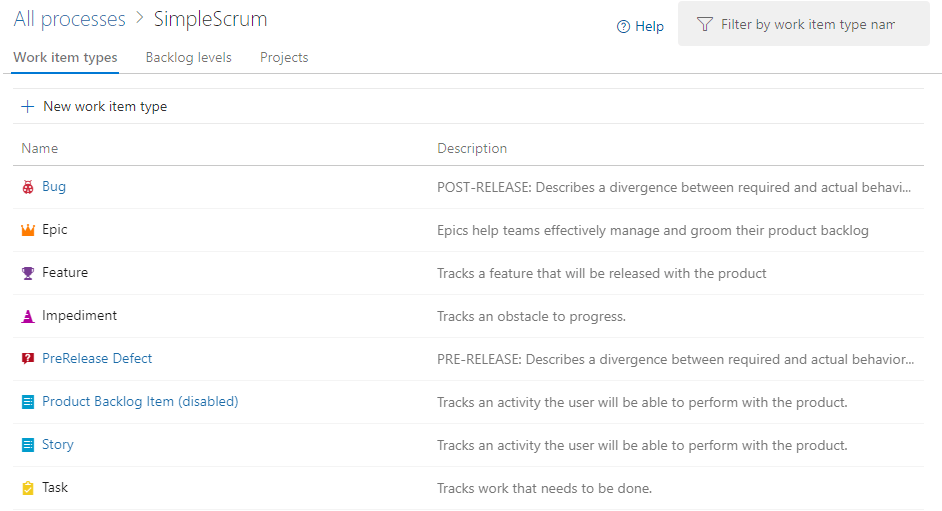
Open the SimpleScrum process. Under Work item types, we already have an essential set of types. Let's start by creating a work item type named Story instead of Product Backlog Item (PBI).
No, you can't rename an inherited process work item type. I hate this, and so do you.
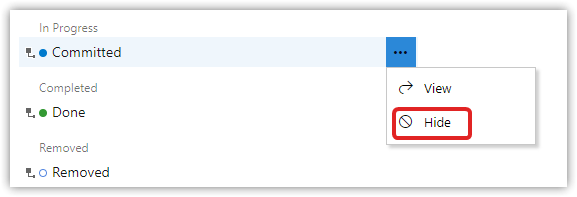
Open the PBI work item type > States, and hide the Committed state.
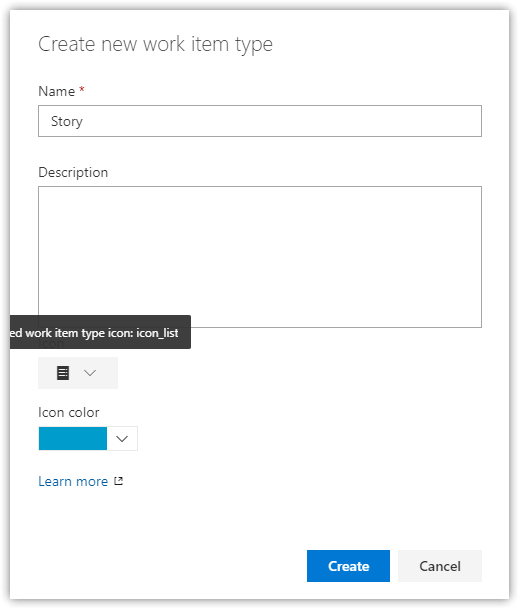
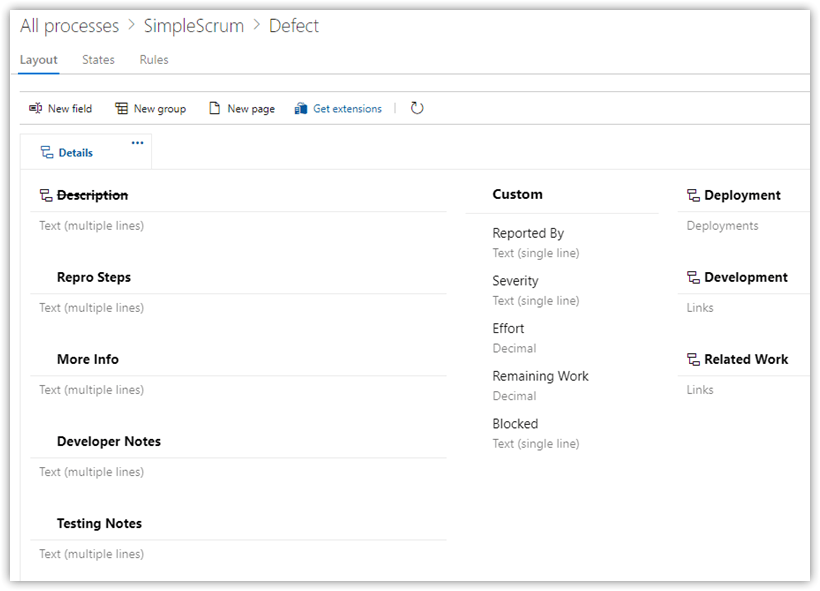
In the original tab, choose New work item type and name it Story
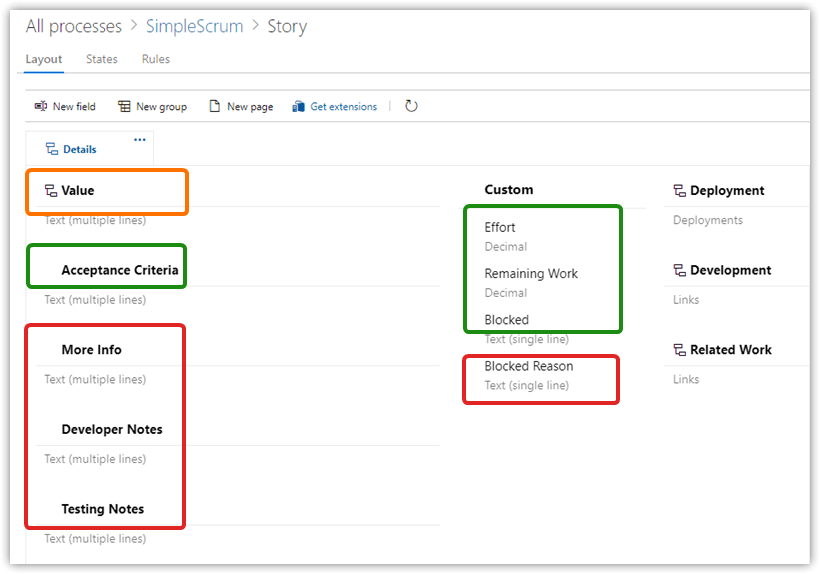
Under Layout, add and update the fields to look like this. In one case, you're renaming Description to Value (orange), in others you're using an existing field (green), and in still others it's a new field (red).
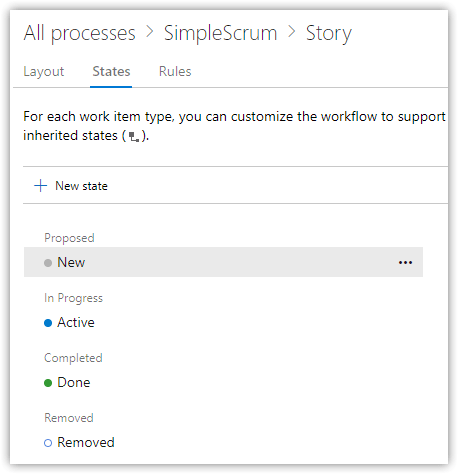
Under States, add two new states: Active in the In Progress category and Removed in the Removed category, and remove Committed.
You can only remove an inherited state that's been hidden.
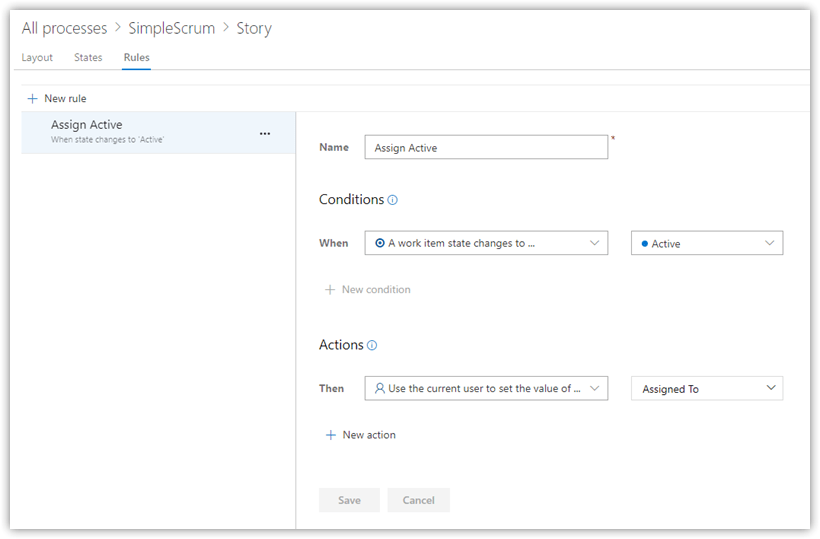
Under Rules, create the following rule.
Return to the Work Item Types and disable Product Backlog Item
Important
Only disable PBI if you are not going to apply the new process to an existing project. If you are, leave PBI enabled so that you can change existing work items from PBI to Story.
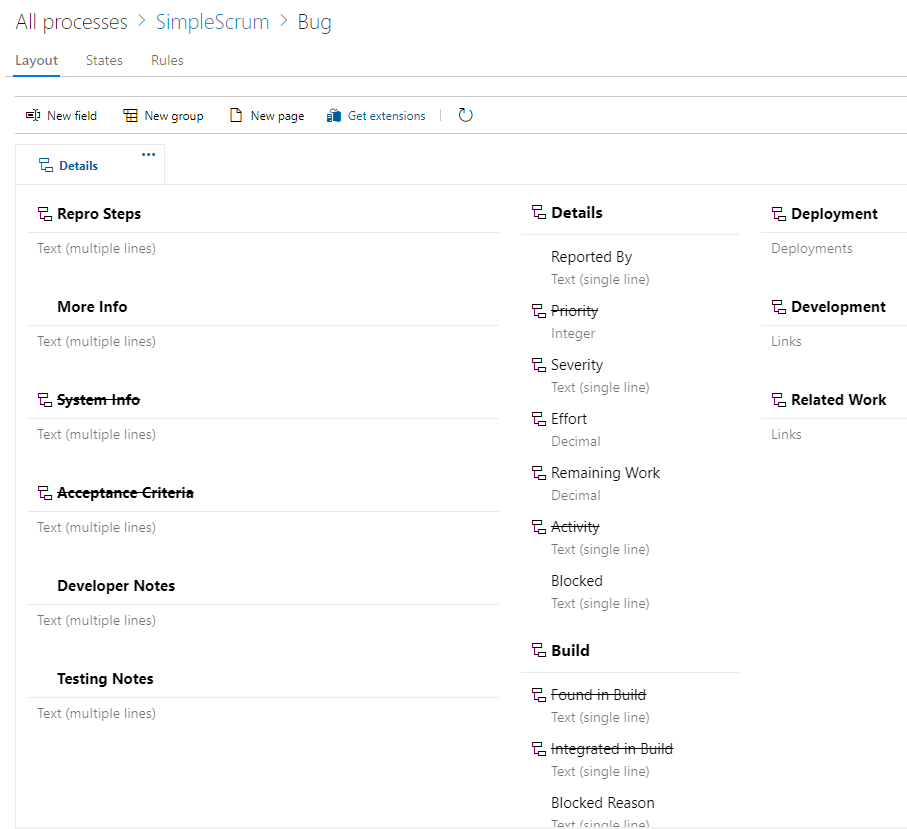
Open Bug and make these changes.
Any fields added to Story will be in the "Use existing field" dropdown.
Important
Treat Bugs as a defects reported by production users. Why? Because it makes it much easier to track Bug fix cycle time. See below for tracking defects during development.
Under States, add Active to In Progress, hide Approved and Committed
Under Rules, create the same Assign Active rule as in Story
If your shop includes quality assurance, user-acceptance testing, or other non-unit testing, you should track your defects separately from Bugs. If those roles are in your team, then I like communicating those defects at the same level as Tasks. If they're outside the team, then I recommend tracking them at the same level as Bugs.
OK, the work items are ready!
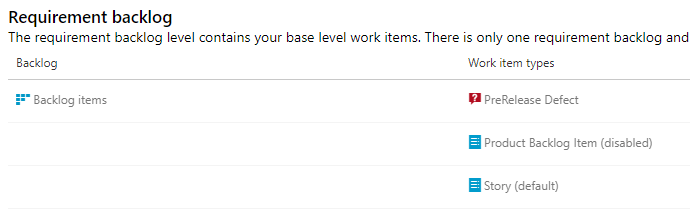
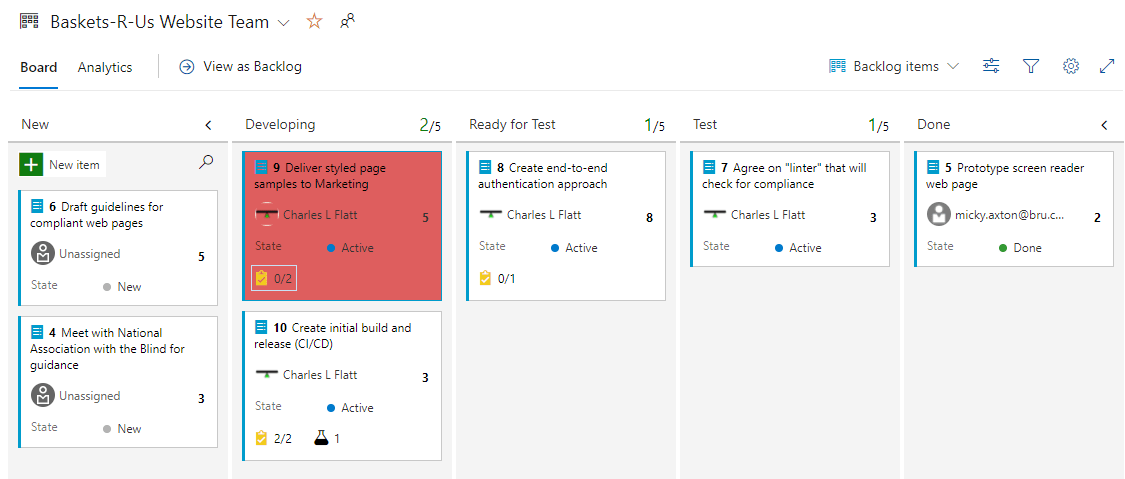
These changes make your new work item type availabe in the New item dropdowns on boards and backlogs.
You can create a new Project using the SimpleScrum process, but you can also apply the process to an existing project.
Warning
Applying a process does come with risks if there are non-matching fields. Be sure you read the documentation!
I'm going to apply the process to Baskets-R-Us (from Part 1 of the series) so you see what's involved and why starting with a new project might be better.
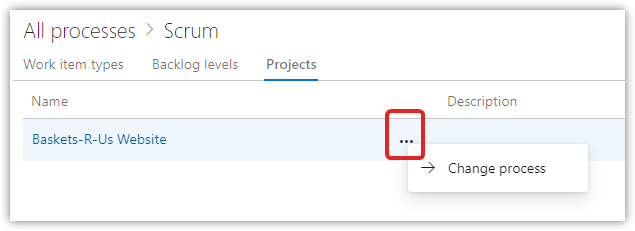
Open All Process and click the Scurm Team Projects link
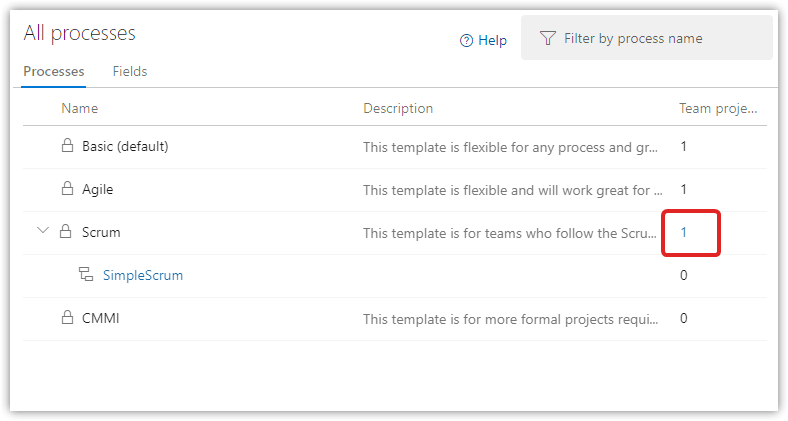
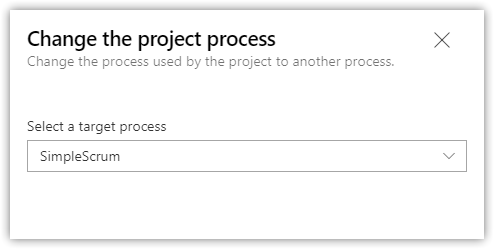
For BRUW, select Change Process and choose SimpleScrum
Open the BRUW project > Queries > New Query
Return all work items
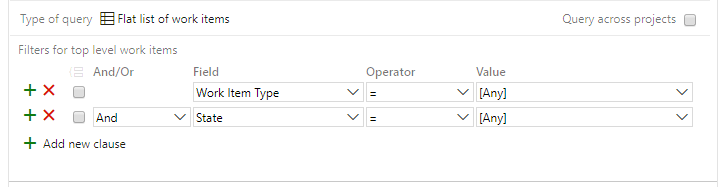
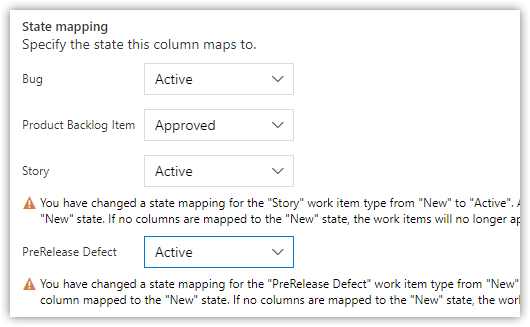
Open Column Options and add State and Reason. Sort by Work Item Type and State
Select all Product Backlog Items, right-click > Change Type, select Story.
Select Commmitted items, right-click > Edit, change State to Active
Select Approved items, right-click > Edit, change State to New
Save items
You may have other changes to make to your work items.
Story Board customizations are at the Team level
Open the BRUW project > Boards. I was greeted with this message:
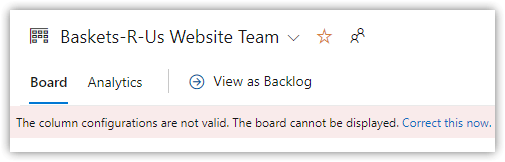
Fine, I'll Correct this now. It's the board's column settings that need changing, which is what I want to do anyway!
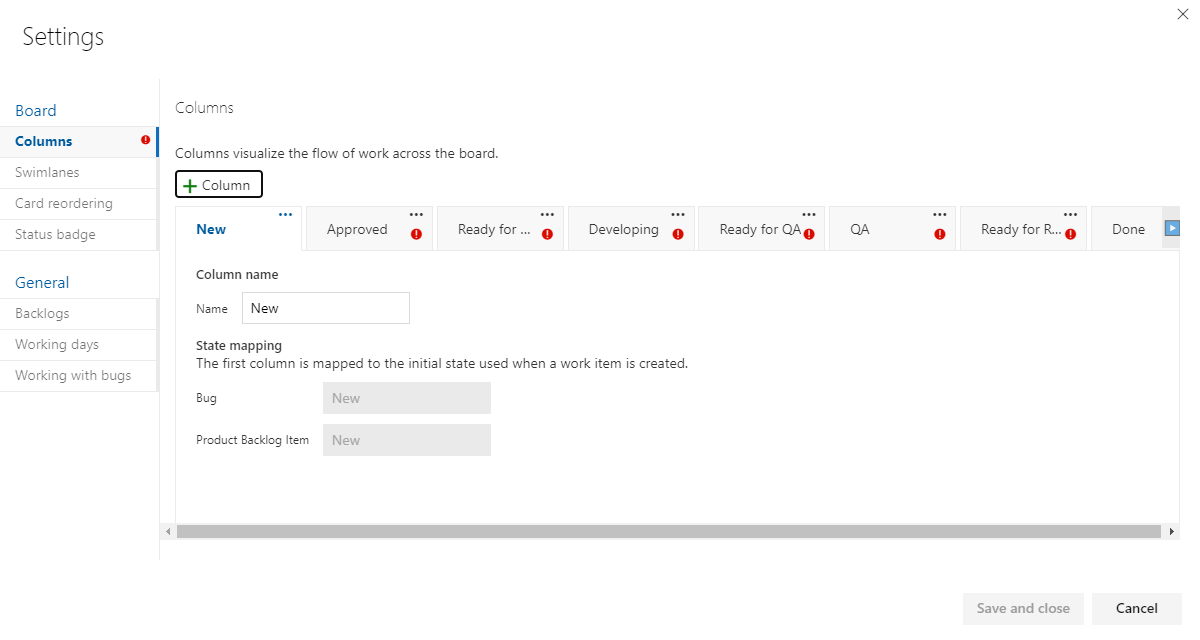
You can't delete any columns that have stories in them until you move the stories.
Open the board's Settings > Styles, add a styling rule

If a Story's Blocked field is set to Yes, the card will show red.
Task Board customizations are at the Team level
Azure DevOps supports templates, and I wish they were useful. Maybe they will be for you, but what I want is to assign a default template to a work item for my team. For example, have a Bug template with starter info in Repro Steps that's automatically applied on any new Bug.
Until that happens, I'll leave you with Microsoft's documentation.
Use work item templates to update stories & more - Azure Boards | Microsoft Docs
This post sets up a good, basic process. A key aspect is that work items at the same level are structured almost the same. This helps reduce cognitive friction switching from a Bug to a PreRelease Defect to a Story, and emphasizes that the primary difference between them is their name.
As one Scrum consultant I heard interviewed put it, "I think of every work item as a story."
In the next post, we'll put this process to work.
2021-05-14 16:03
ERROR!
What I say below about how Git commits work, and the recommended pre-PR flow, is correct. However, what I say about pull requests is not correct. In the example below, Sabrina's PR would end up with Jasmine's change because a PR merges into master.My own confusion came from a client situation where a branch was deployed to production, instead of being merged into master first. I didn't spot that detail right away in the pipeline's history.
For many of us with past source control experience (Subversion, Team Foundation Version Control, Visual Source Safe), there's a subtlety to a Git commit that can trip us up when it comes to build/deployment pipelines. We mistakenly think the pipeline will "get latest."
A Git commit is a snapshot of the entire source tree of the developer's workspace. It's not a record of only that commit's changes. This is why it's critical, before submitting a branch pull request or a commit to mainline (depending on your workflow) that you pull the remote repository's latest code into your local repository.
Imagine two developers, Jasmine and Sabrina. They're going to work on a repo with two files.
|_princess.txt
|_witch.txt
At 1pm, they both clone the remote, so both their local repositories exactly match. I'm showing the SHA hashes below.
HEAD aaaa111  <== this is the commit number
|_princess.txt  bbbb111
|_witch.txt     cccc111
Let's be really clear. Git doesn't know about the files. It knows about the hashes it uses to name its copies of the files. So Git's commit tree is:
aaaa111
|_bbbb111
|_cccc111
They each create a separate branch. At 1:30pm, Jasmine changes her file, commits, and creates a pull request. Her commit tree is:
HEAD aaaa222
|_princess.txt  bbbb222
|_witch.txt     cccc111
When the PR is approved and commit aaaa222 is deployed, those files are deployed.
At 2:00pm, Sabrina changes her file, commits, and creates a PR. Her commit tree is:
HEAD aaaa333
|_princess.txt  bbbb111
|_witch.txt     cccc222
This is the important part: Sabrina didn't pull from the remote, so her commit tree doesn't include Jasmine's changes.
When the PR is approved and commit aaaa333 is deployed, Git does not get the latest princess.txt nor should it. Git checks out the named commit tree, and that commit has the earlier princess.txt.
What Sabrina needed to do before the PR is:
git checkout main
git pull --rebase
git checkout myfeature
git rebase main
git push
# OR git push --force <== if the branch was previously pushed
If she does this, her commit tree for the PR will be:
HEAD aaaa444
|_princess.txt  bbbb222
|_witch.txt     cccc222
Now the PR will deploy the latest files because that's what's in commit aaaa444.